
Get Started with Twitter
Some usefull tips and tricks as well as how to download
Twitter features definitions:
Hashtag: a word or a sentenced phrase that is created by using a hashtag or the pound
symbol (#) right before the phrase.
Normally when something is trending it is because there is a hashtag that is being commonly
used.
Tweet: this is basically where you will be able to “post” something. You have about
280 characters to type and/or include
an image of anything you would like to “post/tweet”
Retweet: this is basically re-posting someone else's tweets. You have the option to
share it and/or quoting it.
Quoting it means that you are able to add your own comment to the tweet.
Trending Topic (TT): this is the section that gets the most comments, likes, and
attention all throughout twitter.
Depending on how popular these topics/ comments are, they can be trending for days, weeks,
and/or months. You can always adjust
to whether or not you would like to see a global trending section or just your own country’s
topics.
Twitter followers: these would be people who follow you and watch your feed whenever
you post.
Unfollow: this means that someone is no longer following someone’s timeline/ account.
Twitter verified accounts: this is noticed by seeing a blue check icon by someone's
display name and/or username.
It just shows that the person or company is real.
Mention: When someone is sending direct public tweets, they would need to place your
username into the tweet in order
for the tweet to reach your notifications. You need to start your mention with “@” icon then
proceed to typing their username.
How to create a Twitter account: Step by Step guide
Step 1: Download twitter from you mobile device
Apple IOS devices: Go to the “App store” and search “twitter”. Then click on “install” and allow the app to download.
Click here for Apple download
Android/Google Pixel/ and other mobile devices: Go to the “Google Play Store'' and
search “Twitter”. Then click on “install” and allow the app to download.
PC/ Windows/and other computer/desktop users: Go to: Click Here
Step 2: Creating a Twitter Account
Disclaimer: Remember that different devices may have a slightly different look than other
devices
but the instructions/ steps to use twitter will be the exact same. For example the page to
log in/sign
up for twitter on an apple device will look different than it would for a computer software
but to
access and utilize twitter is the exact same.
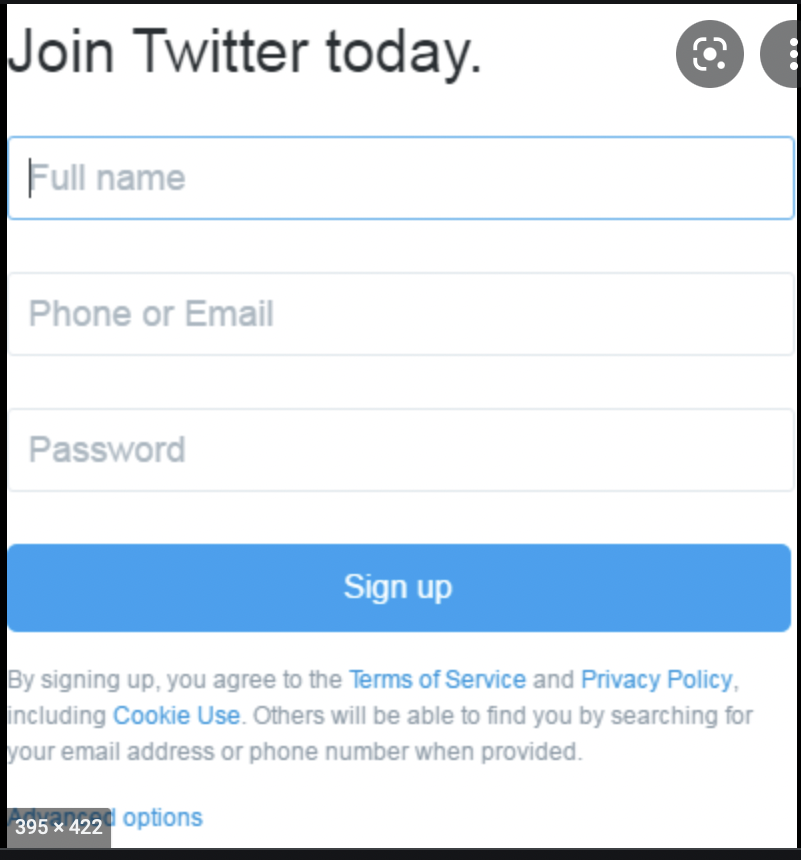
1. Since we are creating an account click the “sign up”


2. Placing your information:
Another screen should appear and it will ask you to input your name, phone, and date of
birth. Instead of inputting your phone number you can change that option by placing your
email address. Remember that placing your email address will be created as your username. To
change it and/or adjust it follow the steps in the next section.
3. Verification/Confirmation:
Depending on whether you are using your phone number or email address, you will receive
a confirmation code that is needed to verify that you are not a robot. If you are using your
phone number, you will automatically get a text message with your code and if you are using
an email address you will receive an email from twitter with your confirmation code.
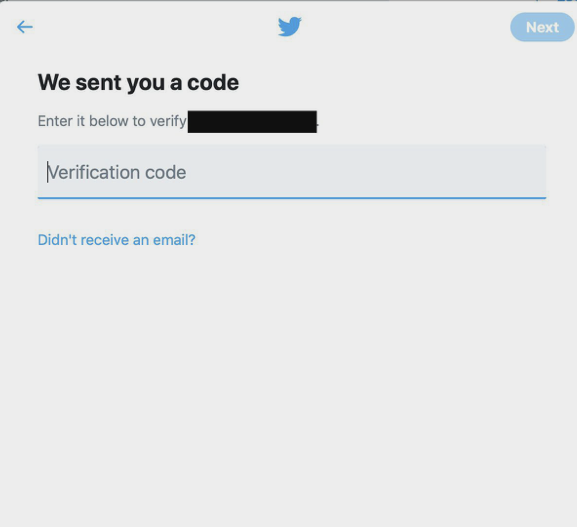
4. Once you have completed the steps above, click Next.
*Google/Apple account users: If you are not using your other email address (i.e gmail,
yahoo, etc) sure to click on your account before clicking next again. If you do not see your
email account, you can simply click on “add another account” and input it in.
Then you will see another pop-up page. It will say, “Customize your experience”. You can
adjust to your likings by checking whether you would like to trace where you are able to see
your Twitter content.
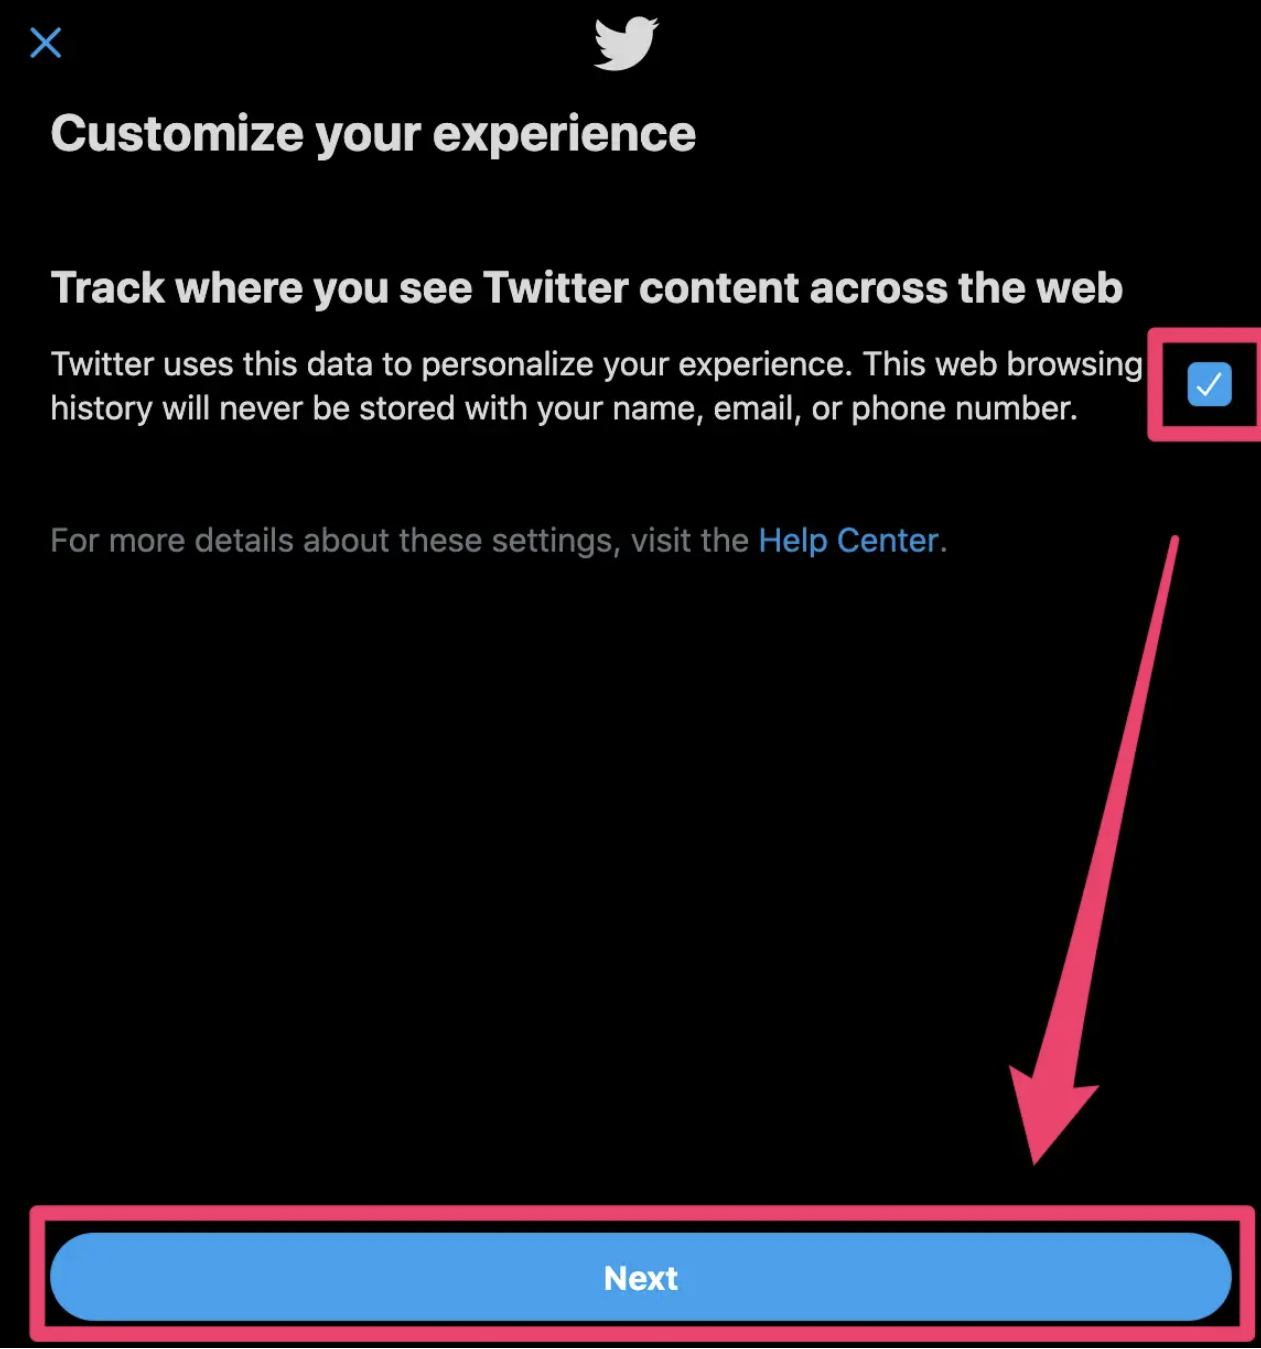
5. Then click next and create your password.
Username/Bios/Display Names
Your username is also known as your “Twitter Handle”. For those that used their email
address this would be your username but you can always change it. Your username can turn
into a URL, which you can place in your other media bios. Your username will appear right
under your display, which can include any numbers, spaces, letters, and punctuation.
To change/ create a username:
1. Click on the three dots or the “more” options on the navigation bar
2. Tap on “Security and Privacy”
3. Then click on “your account”
4. You then need to click on “your account information”
5. For confirmation purposes will need to input your Twitter password in order to
continue. This is used as you getting into your account and not anyone else.
Now you will be able to see your current username, which you can then delete and add
your own username. You will be able to use any username you would like to use as long as it
fits the more than four characters and no more than 15 characters and no spaces, but all
other punctuation will suffice, requirement. Remember that usernames and bios/ display names
are NOT the same thing.
Click “Save”. Remember to always save your changes because it will not automatically
save if you do not manually hit save.
Bio:
Your bio is the section right underneath your username and display name. You can put anything you want in this section. For example, if you want to place external links/ URLs, place your other social media handles, etc.
Setting up Your Twitter/ Maintain your account
Now that you have created a twitter, it's time you add some uniqueness to your account.
Step 1: Add a profile picture
Adding a profile picture is not required. If you choose not to have a profile picture, your followers or others that are displaying your account will see a gray person in the left corner. If you do want to place a profile picture, follow the steps below:
1. On the left corner of your account, you will see a gray person icon. Click it.
2. Then a pop will appear. Allowing you to change and/or place a picture. You will need to allow Twitter to access your photos in order to choose a picture in your photo album. You may also need to enable your camera in order to take a live picture, if you choose this option.
Step 2: Complete Your Bio
This allows for room for introducing/ spreading somethings that you like. Having a bio allows other users to get an insight on your content.
1. On the right corner of your profile page you should see “edit your profile” click that
2. Then click on the word “bio” on the left side
3. Then you may add whatever it is you would like
Step 3: Follow People
There are plenty of ways where you find users to follow. You can always check the “trending” section to see who is sharing content that you like or you can check the home page.This is where twitter will place tweets that are not “trending” but have a good amount of likes, comments, and retweets.
Tips: Try to follow a mix of verified accounts and not. This will create a variety of attractions for your feed. Tip two, to get followers you might need to follow first. Some users only follow other users if you follow them first.
Step 4: Familiarize and Utilizing Twitter Lingo
In order to engage and create a “streaming” feed for others to view. You would need to use the different features that twitter has.
1. Use Hashtag (#): This will allow you to join and create conversation with each user who is talking about a certain topic that you may be interested in.
2. Retweeting
This will allow you to spread other tweets into your feed. Many of your viewers may see the retweet from your account before they see it from the original account that posted it.
3. Mentioning
You should include the user/account you are directing your conversation to. Most times this drives other users to join the conversation, which then allows you to gain attraction.
Step 5: Figuring out what content you want post
Knowing the exact content you will be sharing on twitter is helpful with gaining attraction. You don't have to stick to just one topic but having one content topic is really important towards gaining other users.
Step 6: Joining the Twitter Trending Hashtag
Joining into conversations that are already trending is another great way to spread your content. You will not only be able to gain attraction but you will also be able to possibly go viral. If you introduce your brand/company this would be a really good idea to join trending topics because you will be able to spread your content.
Step 7: Maintaining your account
Figuring a time and day to post your content is really important. Only because your viewers might be really active where they can notice that you have ghosted your account. If your last post was months or weeks ago, your followers might decide to no longer follow you or are no longer interested in your content. You also do not need to post excessively either. Many individuals may get tired of their notifications constantly blowing up or even tired of trying to keep up and may decide to unfollow. Try to engage with them as often as you like. Set time frames to post and become active.
https://help.twitter.com/en/using-twitter/create-twitter-account